In **Pragmata**, Sector 1 is the **Solar Power Plant**. This introductory region serves as the tutorial for Hugh and Diana’s journey, but it contains several hidden items and upgrades essential for 100% completion. To fully clear this sector, you will need to return later in the game once you have unlocked the **Lim Eraser** ability (obtained in Sector 2: Mass Production Array).
## Sector 1: Solar Power Plant Collectible Summary
There are a total of **15 tracked collectibles** in this sector:
* **Mini Cabins (Cabin Coins):** 3
* **Escape Hatches (Fast Travel):** 3
* **Safe Boxes (Lunum/Resources):** 3
* **Read Earth Memories (REM):** 2
* **Pure Lunum:** 1
* **Mods:** 1
* **Storage Expanders:** 1
* **Cartridge Holders:** 1
—
## Generator Entrance
This is the starting area of the game. Most items here are accessible only through backtracking.
### 1. Escape Hatch #1 (Generator Entrance)
* **Location:** Found early in the mission, shortly after the first combat encounter. It is located in the main corridor leading toward the Power Distribution Center. Interacting with it unlocks the fast travel point.
### 2. Storage Expander #1 (Backtracking Required)
* **Requirement:** Lim Eraser (Sector 2).
* **Location:** From the start of the level, head forward and then right toward the window labeled “0037 Test Module.” Take the next right to find a room blocked by blue **Lunafilament** (crystal-like structures). Use the Lim Eraser to clear the path. The expander is inside, which increases Diana’s Hacking Gauge.
—
## Power Distribution Center
This area features the large central chamber with five locks that must be hacked to progress.
### 3. Safe Box #1
* **Location:** In the chamber with the five-lock door. Go to the left side of the room and drop down to the lower level. Use the elevator to go up, then head to the far right corner. Drop down onto a dark floor area behind some movable platforms to find the box.
### 4. Safe Box #2
* **Location:** In the same five-lock chamber, look for a set of stairs guarded by two flying drones and a “crusher” bot. Clear the enemies, jump over the moving lasers, and disable the tripwire to reach the safe box at the top of the stairs.
### 5. Mini Cabin #1
* **Location:** Near the first lock where you obtain the **Stasis Net** weapon. Enter the tunnel next to the lock. You will be trapped inside and must defeat a wave of enemies. Once the path opens, exit the tunnel and look immediately to your right. Shoot the spinning figurine to collect it.
### 6. Escape Hatch #2 (Power Distribution Center)
* **Location:** Located on the mandatory story path after completing the five-lock puzzle and moving toward the Concourse.
### 7. Pure Lunum #1 & Safe Box #3 (Backtracking Required)
* **Requirement:** Lim Eraser (Sector 2).
* **Location:** Near the area where you first received the Stasis Net, there is a path blocked by blue Lunafilament. Erase it and enter the hidden combat arena. Defeat all enemies to spawn reward crates containing the Pure Lunum and the final Safe Box for this sector.
—
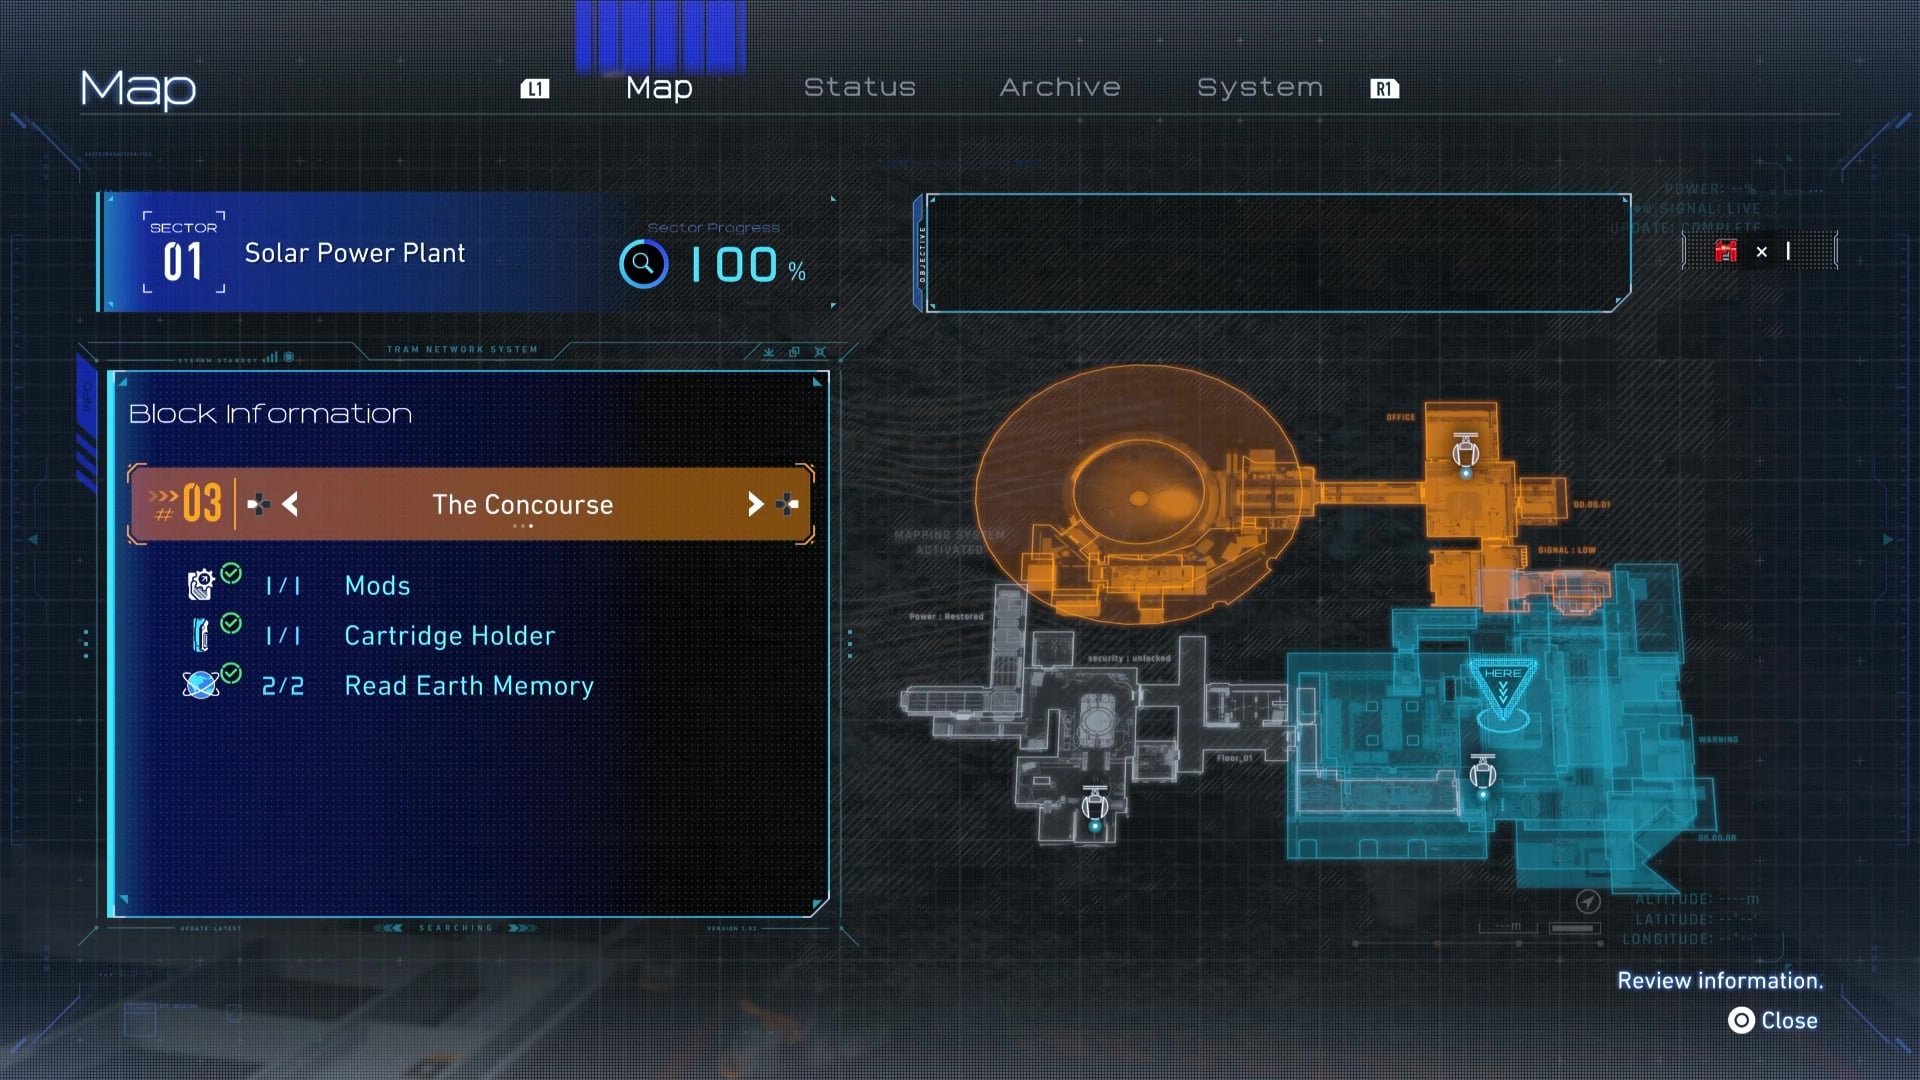
## The Concourse
The final section of Sector 1, containing residential and research facilities.
### 8. Read Earth Memory #1 (Globe)
* **Location:** **Unmissable.** This is obtained automatically during the cutscene where Diana interacts with the globe in the residential quarters.
### 9. Mini Cabin #2
* **Location:** In the same room as the Globe REM. Look at the bunk beds on the left wall. The figurine is hidden behind the mesh of one of the empty bunks. You may need to adjust your angle to get a clear shot.
### 10. Escape Hatch #3 (The Concourse)
* **Location:** Found in the hallway just past the residential quarters, labeled as the “Main Control Lobby” fast travel point.
### 11. Mod #1 (Hardened Suit)
* **Location:** Located in a blue chest sitting directly next to Escape Hatch #3. This mod increases Hugh’s defense against physical impacts.
### 12. Cartridge Holder #1
* **Location:** In the medbay room to the left of Escape Hatch #3. Interact with the orange medical device near the gurney to increase your maximum healing cartridge capacity.
### 13. Mini Cabin #3
* **Location:** After the first hacking node tutorial, you will reach a vertical zipline. Before riding it, look up and behind you. The figurine is sitting on top of the ventilation pipes halfway up the shaft.
### 14. Read Earth Memory #2 (Crayons)
* **Location:** At the top of the zipline mentioned above, look for a flickering section of the wall. This is a hologram. Interact with it to reveal a hidden room containing the “Crayons” REM.
—
## Collectible Mechanics & Tips
* **Mini Cabins:** These figurines emit a distinct “singing” or chiming sound when you are nearby. You must shoot them to collect them. They are used at the **Stamp Club** in the Shelter to unlock outfits and lore.
* **Unknown Signal Mode:** If you miss any items, you can return to Sector 1 via the Tram system after finishing the story. This “Cleanup Mode” allows you to use all end-game abilities to reach previously locked areas.
* **Scanning:** Use Hugh’s scan pulse frequently. It will highlight the blue glow of Mini Cabins and the orange/blue outlines of resource boxes through walls.
* **Unit Printer:** Ensure you take any “Weapon Units” found in Safe Boxes back to the Shelter’s Unit Printer immediately. If you use a weapon’s ammo completely before “printing” it, you may need to find another unit to unlock it permanently.


Leave a Reply