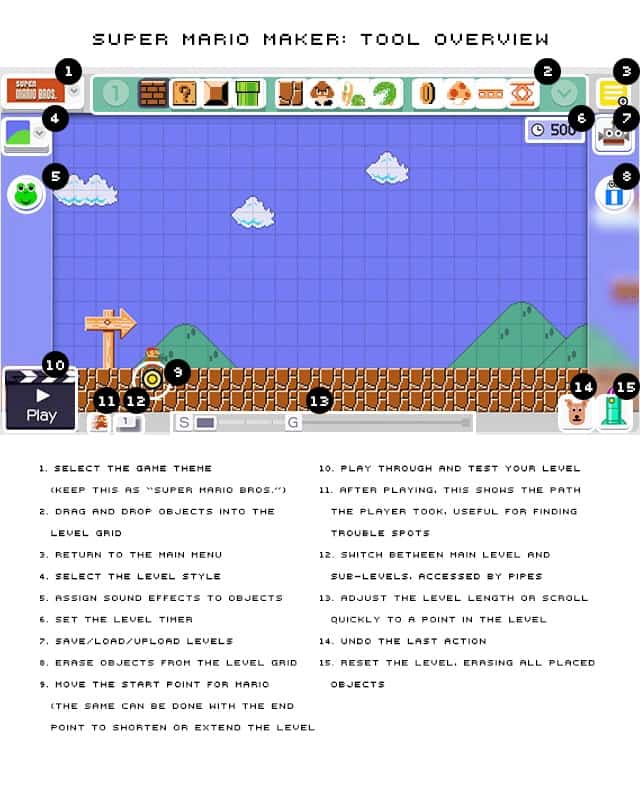
In Super Mario Maker 2, the course editor offers an intuitive way to place various elements such as Blocks and Enemies, enriching your course designs. Below is a detailed guide on how to effectively use the item selection and placement tools in Maker Mode:
Step-by-Step Guide to Place Enemies and Blocks
1. Open the Course Editor: Launch Super Mario Maker 2 and navigate to the course editor. Opt for Maker Mode to begin designing your level.
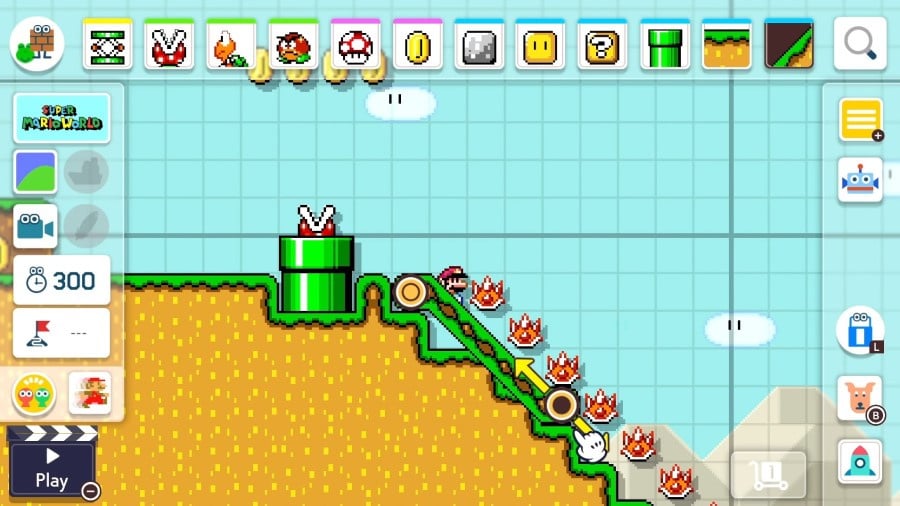
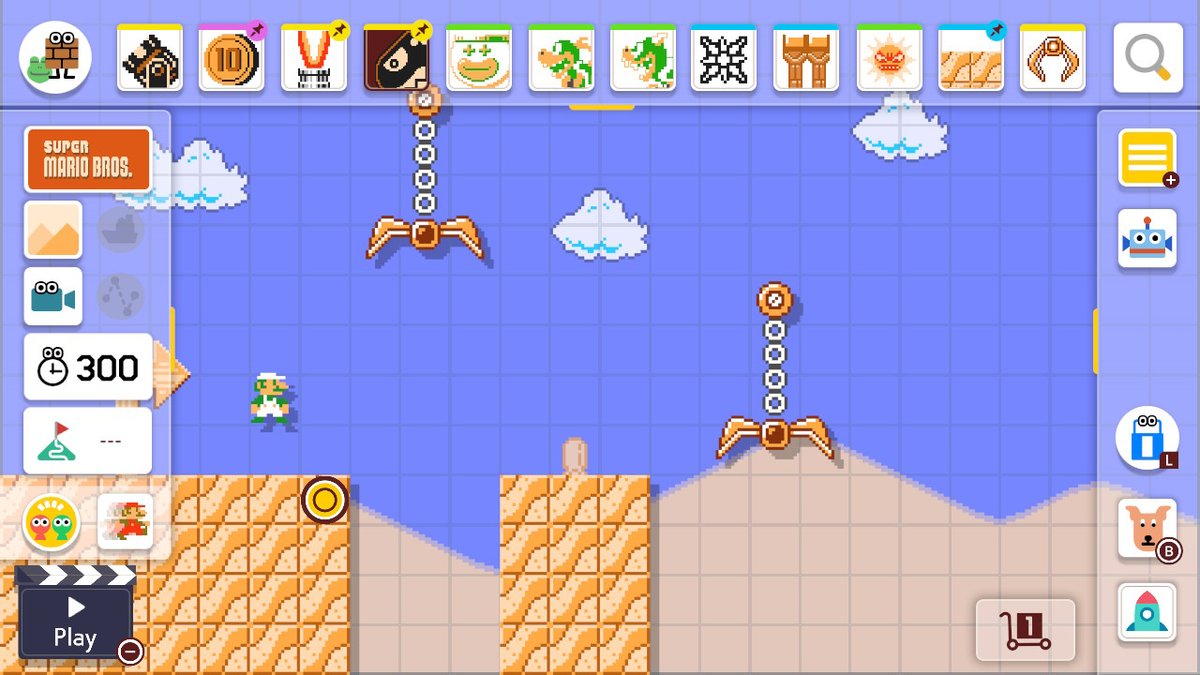
2. Access the Element Menu: On the side or bottom of your screen, you will find a menu showcasing a variety of elements categorized for intuitive selection. Categories include:
– Blocks: This can include various types such as Question Blocks, Hard Blocks, Ice Blocks, etc.
– Enemies: This category consists of a wide range of characters from Goombas to Koopas and more.
3. Select the Desired Category: Click on the category—either ‘Blocks’ or ‘Enemies’—that you wish to work with for your level design.
4. Pick Your Specific Item: After selecting the broader category, a submenu will appear. Browse through it and select the specific block or enemy you want to utilize in your course.
5. Position Your Item: Using the cursor or, if using a touchscreen device, your stylus, navigate to the grid layout where you want to place your chosen block or enemy. Note that this is a grid-based system, allowing for precise placement.
6. Place the Item: Once you are satisfied with the location, click or tap on the grid to place the selected block or enemy onto your course. You will see the item appear in the designated spot.
7. Adjust Placement: If you need to reposition any blocks or enemies after placement, simply click and drag them to a new position. If you wish to remove an item, select the eraser tool and click on the unwanted block or enemy.
Additional Features
– Testing Your Course: After placing blocks and enemies, utilize the testing feature to play through your level. This allows you to refine placements based on gameplay and ensure a balanced experience for players.
– Visual Tools: Take advantage of visual aids, such as Mario’s movement arcs, to help visualize how blocks and enemies interact with the player. This can assist in achieving the right level of challenge and fun.
Conclusion
The drag-and-drop system in Super Mario Maker 2 makes it easy to add and customize the elements of your course. By following these steps, you can create a dynamic and engaging gameplay experience tailored to your vision. The process encourages creativity and experimentation, allowing you to design levels that are not only fun but also well-balanced. Enjoy the satisfaction of crafting your own Mario levels!


Leave a Reply