
Creating custom maps and adventure modes in Minecraft for you and your friends can be a fun and rewarding experience. Here’s a structured and comprehensive guide to help you get started on this creative journey.
Creating Custom Maps
Using Minecraft’s Built-in Map System
1. Create a New Map
– Begin by crafting an empty map. This can be done using 8 pieces of paper and 1 compass. You can find the empty map in the “Miscellaneous” category in your inventory.
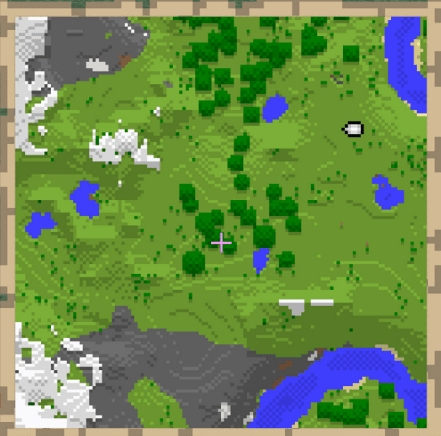
– Once crafted, right-click (or use the action key) with the empty map to generate it; this will create a map revealing a 128×128 block area associated with your current location.
2. Customizing the Map Area
– Explore the surrounding area to fully reveal your desired zone on the map.
– Utilize signs, colored blocks, and other design elements to add custom markers and features, enhancing the visual experience of your map.
3. Converting to Custom Image Maps
– For a more personalized touch, use tools like the MC Map Item Tool. This allows you to replace standard map images with your own custom designs.
– You will need to edit the map files located in your Minecraft saves folder and upload your chosen images.
Using External Tools
1. WorldPainter
– WorldPainter is an excellent third-party tool that allows for in-depth map design. It enables you to create biomes, adjust terrain features, and add custom textures easily.
– Look for online tutorials that guide you through using WorldPainter effectively for your specific needs.
2. Other Custom Map Creation Software
– Explore forums and community resources to find additional tools that suit your map-making style. These can include programs with specific features focusing on biome customization or architecture.
Creating Adventure Modes
Setting Up Adventure Mode
1. Basic Setup
– Choose a location in Minecraft where you want to set your adventure. Design this area to be captivating, integrating challenges, puzzles, and meaningful pathways that promote exploration.
2. Game Mode Configuration
– Switch the game mode to Adventure mode using the command `/gamemode adventure`. This will constrain players from breaking blocks, unless specific permissions are granted through command blocks.
– Utilize the `/give` command to ensure players receive essential items for their journey.
3. Using Command Blocks and Redstone
– Command blocks can be pivotal in scripting events or in-game notifications, enhancing the story and player interaction.
– Implement Redstone to generate mechanisms like secret doors, traps, or puzzles, creating a dynamic gaming experience.
4. Custom Terrain and Features
– Either use WorldPainter or Minecraft’s terrain features to sculpt unique landscape elements that will enhance player immersion and challenge.
Distributing Your Custom Map
1. Exporting the Map
– Once your map is complete, export it as a world file. Copy the relevant world folder from your Minecraft saves directory.
2. Sharing with Friends
– Provide your friends the exported world file, allowing them to add it to their own Minecraft saves directory to access your creation.
3. Hosting a Server (Optional)
– Consider setting up a Minecraft server so multiple friends can join and play the adventure map together. This can amplify the experience through cooperative gameplay.
Additional Tips
– Documentation and Instructions: Create clear written instructions or clues to facilitate smooth gameplay for your friends.
– Thorough Testing: Playtest your map extensively to ensure functionality and enjoyment. Look for bugs or unintended challenges that might detract from the experience.
– Solicit Feedback: After your friends play your map, ask for their feedback. This can provide valuable insights for enhancing your future map designs.
By following this guide and applying these tips, you’ll be well on your way to creating captivating custom maps and adventure modes in Minecraft, providing memorable experiences for you and your friends. Happy mapping!

Leave a Reply