
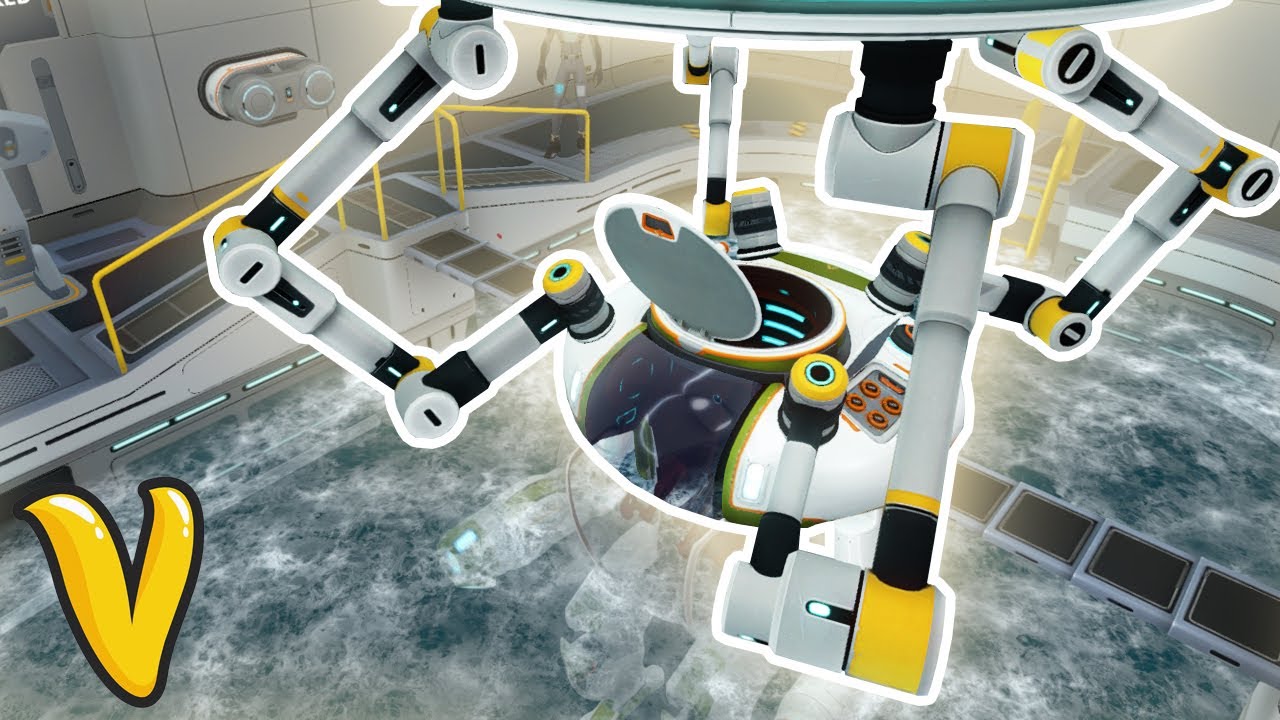
In Subnautica, upgrading your vehicles, specifically the Seamoth and Prawn Suit, is crucial for efficient underwater exploration and survival. To facilitate these upgrades, you’ll need to construct a Vehicle Upgrade Console inside your Moonpool base. This console is essential for crafting and installing various upgrade modules tailored for each vehicle type.
Steps to Install Upgrade Modules
1. Build the Vehicle Upgrade Console:
– Start by constructing a Vehicle Upgrade Console within your Moonpool. This will serve as your primary workstation for vehicle modifications.
2. Dock Your Vehicle:
– Once the console is built, dock your Seamoth or Prawn Suit inside the Moonpool. This positioning is vital as it allows you access to the upgrade functionalities.
3. Access the Upgrade Panel:
– Approach the Vehicle Upgrade Console while your vehicle is docked. This action opens an upgrade panel, where you can install or remove upgrade modules.
4. Understand the Upgrade Slots:
– Each vehicle has designated slots for upgrade modules. The Seamoth typically has four upgrade slots, accommodating a variety of enhancements. The Prawn Suit similarly supports multiple modules designed to boost both functionality and storage capabilities.
Upgrade Modules for the Seamoth
– Depth Module:
– This vital upgrade increases the Seamoth’s crush depth.
– Base depth is 200 meters; it can be upgraded to 300 meters (Mark 1), 500 meters (Mark 2), and even 900 meters (Mark 3) via the Vehicle Upgrade Console, with additional crafting needed at the Modification Station.
– Perimeter Defense System:
– A defensive system that emits electric bursts to deter aggressive fauna while you explore.
– Other Useful Modules:
– Sonar: Displays sonar readings of the surrounding area.
– Storage Expansion: Adds extra inventory space.
– Hull Reinforcement: Increases durability to withstand impacts.
– Engine Efficiency Module: Reduces power consumption.
– Solar Charger: Recharges the Seamoth’s batteries using solar power when at the surface.
Upgrade Modules for the Prawn Suit
– Depth Module:
– Similar to the Seamoth, the Prawn Suit can also be upgraded to increase its crush depth, with a maximum of 1300 meters achievable with the right upgrades.
– Storage Modules:
– Enhances inventory space—each storage module adds six slots, increasing the base capacity from 24 to a possible maximum of 48 slots if fully upgraded.
– Energy Efficiency Module:
– Reduces power consumption by 15% per module. Stacking four modules can provide up to a 60% efficiency gain.
– Specialized Modules:
– The Prawn Suit benefits from unique upgrades such as drill arm enhancements for resource gathering and tailored storage solutions.
Summary of the Upgrade Process
1. Craft a Vehicle Upgrade Console and install it in your Moonpool.
2. Dock your Vehicle (Seamoth or Prawn Suit) inside the Moonpool.
3. Access the Console to bring up the upgrade panel.
4. Select and Install Upgrades from your available inventory.
5. For specific upgrades like depth modules, utilize the Modification Station to create advanced modules (e.g., Mark 2, Mark 3).
6. Any time your vehicle is docked, you can manage and modify the upgrades via the console.
By effectively utilizing the Vehicle Upgrade Console and managing your upgrade modules, you can significantly enhance your Seamoth and Prawn Suit. These upgrades allow for deeper exploration, enhanced defense mechanisms, increased resource management, and overall improved efficiency in your underwater adventures, thereby enriching your survival experience in Subnautica.


Leave a Reply